Apparently, it’s all about the psychology of a person who hopes for the best until the last moment. He sees: the engine begins to smoke and understands that this threatens a major overhaul of the engine, namely the cylinder-piston group. But “experienced” neighbors in the garage can “pat you on the shoulder” and tell you: they say, all this is nonsense: replace the valve stem seals (VSC) and everything will be fine. The parts themselves are cheap, the installation process is simple and you can do it yourself.
 Oil scraper caps LADA 2108 8 pcs. Average price: 424 rub. Photo: YandexMarket
Is it so? We need to understand in more detail, but for a better understanding it is worth first telling how these timing elements work and why they fail.
What do valve stem seals do in internal combustion engines?
Any engine requires lubrication of rubbing parts. At the same time, everything inside must be arranged so that it does not mix with fuel and exhaust gases. How can this happen? There are two main ways. In the first case, the path of oil to the fuel is blocked by piston rings, preventing it from penetrating upward from the oil pan. In the second, lubricant can enter the combustion chamber through the valves, or rather, flow down their rods from the timing mechanism. To prevent this from happening, oil seals (oil seals, seals) are put on the valves (more precisely, on their guides - special tubes).
About construction
Essentially, these are rubber bushings reinforced with metal. A small spring is visible from the outside: its task is to ensure strong contact of the seal edge with the valve stem, which moves inside its guide.
 Oil scraper caps CORTECO. Average price: 300 rub. Photo: YandexMarket
It is clear that valve stem seals are subjected to serious mechanical stress, and at high temperatures. Plus the chemical effects of oil. Therefore, durable special materials are used to manufacture MSCs. Namely: synthetic PTFE rubber, nylon, special grades of steel.
What happens in the engine when the caps wear out?
If we are talking about those installed on the exhaust valves, then the oil penetrates the exhaust tract, where it begins to burn. This gradually leads to the formation of soot on the valve disc. As a result, it becomes “overgrown” with oil combustion products and will no longer be able to hermetically close the outlet. The fact that there is lubricant in the exhaust system will immediately be signaled to you by bluish or even black smoke from the muffler.
Typically, valve stem seals wear out together. But even a leak in one of them leads to increased oil consumption.
With intake valves the situation is somewhat different. When the tightness of the MSC is broken, fuel normally penetrates into the cylinders, but together with the oil, where it burns safely. As a result, the products of this process accumulate on the pistons and their rings. The general result of wear on the oil seal caps is gradual coking of the engine. And this already leads to a decrease in traction, increased oil and fuel consumption and, ultimately, a reduction in the life of the power unit.
How to quickly find out about the wear of the caps?
One of the popular methods: warm up the engine to operating temperature and, when it idles for several (4-5) minutes, sharply press the gas pedal. The essence of the “experiment”: if the caps allow oil to pass through, then it will inevitably accumulate in the exhaust manifold. With a sharp increase in the speed, a large amount of fuel is thrown into the chamber, which will cause the lubricant to instantly burn.
 TRIALLI valve stem seals. Average price: 578 rub. Photo: YandexMarket
This will be clearly visible to the second test participant, who must observe the color of the exhaust. If it turns blue, and at idle it becomes neutral again, we can say “with a high degree of probability”: it’s all about the seals. Alas, an experienced motor mechanic will probably be sure that this was just “grandmother said in two.”
Independent replacement of MSK on "Grant"
It is possible to accurately understand whether the MSCs are worn out or not only after partial disassembly of the cylinder head (cylinder head). And, if you decide to do this and install new caps, then you first need to buy them (see photo above). At the next stage, prepare your tools:
✅ valve desiccant
✅ device for pressing MSK (very desirable)
✅ camshaft seal (recommended)
✅ new valve cover gasket
✅ wrenches for 10, 13, 15 and 17
✅ pliers with narrow noses
Set the crankshaft to the TDC position of the first and fourth cylinder according to the marks. Next you need to get to the camshaft, for which you will have to remove the valve cover, the plug on the right, the belt with the pulley (be careful with the key, it may fall down!) and the roller.
 The video was here. Photo: YouTube.com
On the right side (looking against the direction) we dismantle the plug secured with a pair of nuts and a bolt. The latter has a rubber seal: if it has even the slightest signs of damage, it is better to replace it (it costs a penny!). Having removed the cover, you will see the nuts with which the so-called. camshaft bearings (there are two of them). Now the latter can be pulled out from its regular place. Next you need to extract the so-called. "glasses" from the seats. Mark the pulled out parts so that each one is returned to its seat.
 Place the removed glasses in the order in which they were in the engine. Photo: YouTube.com
The next stage is the installation of a special plate and desiccant on the cylinder head studs. Fastening is done with standard nuts. The second part of the device needs to rest against the washer, under which there is a pair of springs.
 First install the fixture plate. Photo: YouTube.com
Press down on it and remove the crackers (2 pcs.) from the valve grooves. There are several options: somehow get smart and remove them using a screwdriver, fingers (if you have thin ones) or use a magnet.
 Working as a desiccant. Photo: YouTube.com
Now nothing prevents you from removing these two springs. Then use pliers to pull out the old oil seal (throw it away anyway). Install the new one using a mandrel (a deep socket head at “12” will do), after lubricating it with oil from the inside. Pay special attention to the crackers, which “have a habit” of falling out, falling through somewhere and simply getting lost. Then - MSC of the second valve.
When installing the cap, use a hammer carefully (if you have enough strength, it is better to hit with your palm) - the material of the guide bushings is fragile. And changing them is another story!
Do the same with the fourth cylinder. Then, turning the crankshaft 180 degrees - with the second and third. All that remains is to collect everything, put it in place and rejoice! But there is a nuance. The whole point may not be in the caps, but in the guides, which, like their valves, can also exhaust their service life: then installing new oil seals will do nothing.
Should I do it myself or hire a service?
There are two important aspects here. At the technical station you will have to pay: the average cost of the operation in the Moscow region is 11 thousand rubles. In the regions, naturally, it is a little cheaper. So you have to do it yourself? Here the second point appears - during the work it is extremely advisable (which is what everyone does) to test other components, since they have already been disassembled!
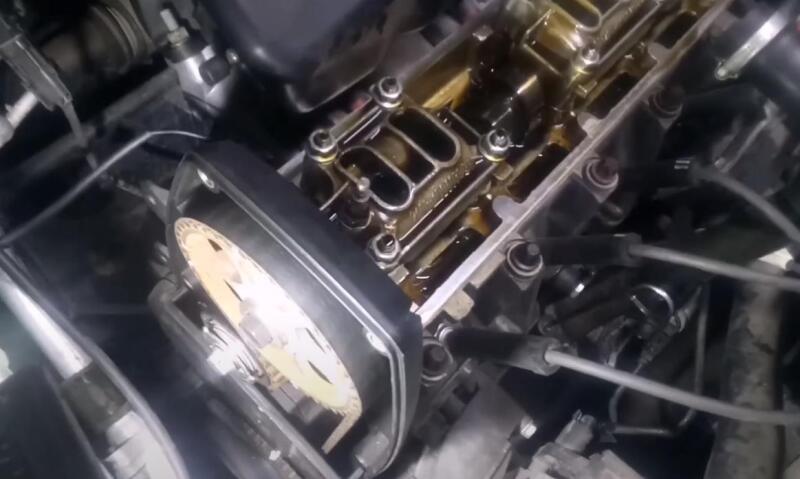
 Along the way, it is worth inspecting other details. Photo: YouTube.com
For example, assess the condition of the camshaft, the drive belt rollers, the belt itself, the gears, at the same time measure compression, etc., etc. But can you do all this in a garage? A question that needs to be resolved. Otherwise, you will have to constantly disassemble/assemble the cylinder head. It’s better to check everything and do it right away.