What do we need?
Before you start assembling, prepare the tools that will definitely come in handy:
✅ 4, 5 and 6 mm hexagons
✅ wrenches for 10 and 15
✅ Phillips screwdriver of convenient length
✅ any pliers and wire cutters
If you haven't unpacked your bike yet, you'll need a utility knife. You can take the usual, it does not matter. Ideally, also prepare a stand on which the frame will be fixed during assembly. You can do without it, it will just make the process more comfortable.
Unpacking accessories
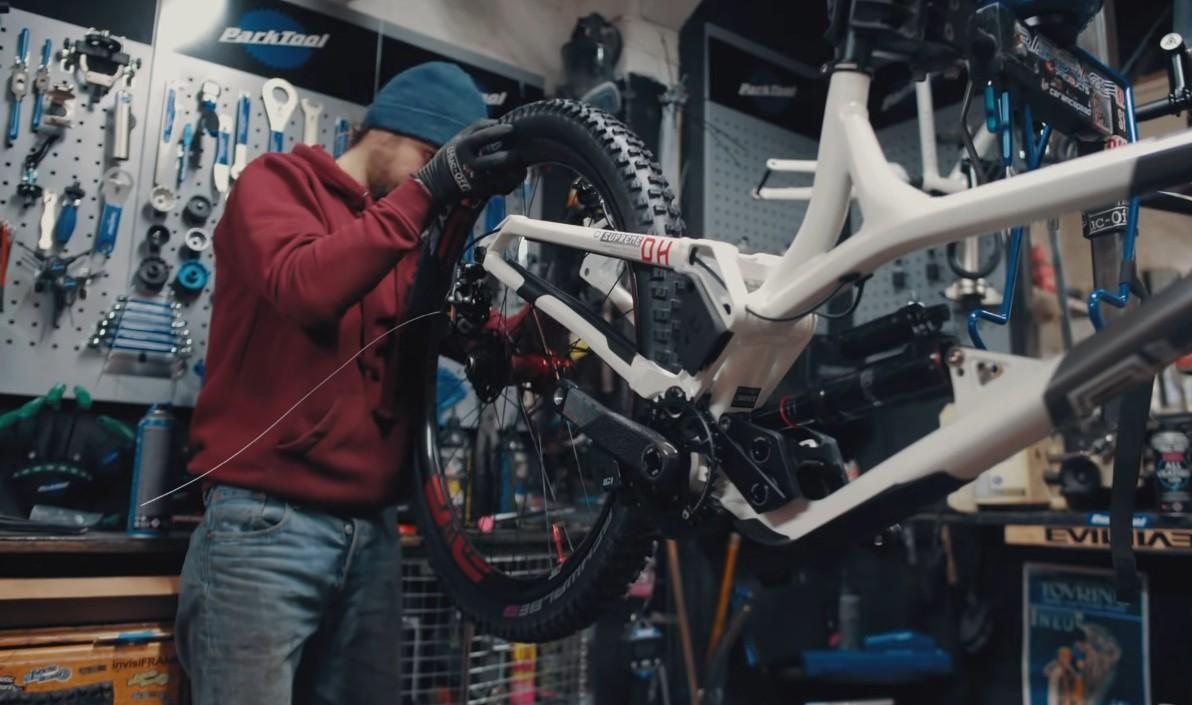
The first stage is to open the box with the bike and take out all the components from there. As a rule, manufacturers lay down a practically assembled frame with cranks, chain, rear and front derailleurs (if the model has a transmission), rear wheel, brakes and steering column. Pedals, seat, steering wheel, front rim with tire and small things are packed separately.
 Lay out all the details on the floor so you don't forget anything. Photo: youtube.com
You got the parts, now with the help of wire cutters carefully cut all the plastic clamps with which the packaging of components is fixed. If there is no such tool, it can be replaced with powerful scissors. Be very careful at this stage, as it is easy to scratch the paintwork of the parts, which will cause the bike to rust later.
While the frame is disassembled and easy to manipulate, immediately copy the serial number stamped on it into the warranty card. Usually the desired combination of numbers is located under the carriage.
Assembly of the front
Usually, the assembly of a bicycle begins precisely from its front side, in order to hang the wheel as quickly as possible and put the vehicle in a level position, convenient for further work.
Column
Many bike models have a steering column installed at the factory, but if it is not, you will have to install it yourself. Before that, treat the seating surface of the steering cup with grease, then press the so-called “cups” into it. To do this, you can use a rubber mallet or even a plank, tapping on the details. It is important here to ensure that the cups are pressed in without distortion, otherwise you will spoil the end of the head tube.
Takeaway
Carefully unscrew the stem cover with a Phillips screwdriver, then position the handlebar itself so that it is exactly in the middle. The correct position will help determine the risks - marks on the metal. After that, evenly tighten 2 or 4 bolts (depending on the bike model) with a hex wrench. As a result, the handlebar should be positioned so that the brake levers are oriented downwards at an angle of 30 to 45 degrees horizontally - as you see fit.
 Tighten the bolts carefully so as not to strip the threads. Photo: youtube.com
Horns
Horns are handles oriented perpendicular to standard handlebars. If your bike model has these parts, first loosen them with a 5mm hex wrench, then rotate them 20-30 degrees upwards horizontally so that you can comfortably hold them. After that, smoothly tighten the fasteners with the same wrench.
Wheel
Take the front wheel and inspect it for an indication of the direction in which the rim should rotate. If there are no symbols, then the installation position does not play any role. Otherwise, position the wheel so that the arrow points straight ahead.
Install the rim into the fork in such a way that the axle is clearly fixed in its grooves. Next, you need to insert an eccentric into the axial part of the sleeve. At the same time, his foot should be on the left in the direction of travel, and the springs on both sides, so that their narrow edges are directed towards the center.
Before fixing, position the eccentric tab so that it is parallel to the wheel axis. Next, tighten the plastic nut with your fingers and clamp the “paw”. It is not worth tightening the sleeve strongly in order to avoid the risk of stripping the thread, but the fastening must also be reliable.
After assembly, be sure to inflate the tires to the recommended pressure, which is indicated on the tires. So, for a standard mountain bike, the optimal value would be 3 bars.
We complete the frame
The front of the bike is mostly assembled, so next we will look at what and how to install on the frame in order to get a 100% assembled vehicle, ready for the first ride.
Тормоза
With rim brakes, the only thing you need to do is "fasten them" to make them work. Things are a little more complicated with disk drives, since you will need to manually install a brake machine (caliper). To do this, using a standard fastener, fix the part on the left leg of the steering fork. It is possible that before this you will need to put an adapter.
Install the caliper on the mount and fix it so that both brake pads inside the machine are at the same distance from the disc (rotor). The cable in the protective tube should be screwed to the fork in order to avoid it getting into the wheel at high speed - it will be unpleasant. By the way, on some models, the frames have grooves for transmission and brake cables, use them.
Coins
The gear knobs are mounted on the steering column of the bicycle and tightened. At the same time, do not tighten the fasteners to failure. Ideally, the shifters should rotate slightly under force so that if the bike falls to the ground, the handlebars do not break off, but simply move. Before inserting the transmission cables into the jackets, coat them with a quality lubricant.
Pedals
Both pedals are twisted against the motion of the bicycle. This means that the right and left platforms have different threads, and it is very undesirable to confuse them and try to screw them in by force during installation. First, find the pedal with the letter “L” on the end of the set and screw it into the crank arm counterclockwise. Then take the second piece marked "R" and screw it clockwise.
 Do not mix up the pedals when installing, they are different. Photo: youtube.com
Saddle
Everything is simple here - insert the saddle with the pin into the appropriate cavity of the bicycle frame, then install the eccentric and clamp it. You will definitely need adjustment, so tighten the mount so that the clamped seat does not scroll left and right even with a lot of effort.
Трансмиссия
Install the bike chain on the smallest sprocket on the bottom bracket and on the largest one on the back of the wheel. Next, gradually tighten the screw fixing the frame with the designation L (or Low) until the chain drive is as close as possible to the inner plate, and at the same time it does not touch the frame itself. After that, move the chain to a position in which it is on the largest star of the carriage and on the smallest one at the wheel. Adjust screw H (or High), but now the gear should be as close as possible to the outer plate.
Conclusion
Properly assembling and setting up a bike is just the beginning. Then before each season you have to competently prepare it according to all the rules. By the way, we are also talking about this. wrote. If you are interested in your two-wheeled "horse" to serve for a long time, be sure to read.